Blogger Widgets

Aug 16, 2011

CELEBRATE: Tooth Fairy Party!


Did you hear? The Tooth Fairy is flying around and she has a SWEET TOOTH! Just close your eyes and use your imagination to visualize a make-believe party filled with scrumptious sweets, shiny white teeth, ruffled aprons, magical wands, fairy wings and all that is mystical. Ta-da! SWEET DREAMS can now come true and it is all up to you... 


The birthday girl and her guests will certainly be captivated by this one of a kind DIY Tooth Fairy Party! Enjoy some magical recipes provided by the "Tooth Fairy". Enchanting sweets will come to life with some of her secret ingredients... magic flour dust, pixy sugar and fairyfetti sprinkles. Give the guest child "chefs" the option to decorate their very own cupcake sundae, tooth shaped sugar cookie, toothbrush pretzel or other Tooth Fairy inspired recipes. And may all their SWEET DREAMS COME TRUE with each delightful bite! Continue to explore the details of this Tooth Fairy Party below and find some whimsical inspiration provided by the Creative Orchard!


This party was also FEATURED on Sweet Designs Blog by Amy Atlas!!! Click Here!


Welcome Area: A Tooth Fairy welcome sign and menu were placed side by side in an open binder resting on a cookbook stand to greet guests as they arrived. Be sure to provide tooth brushes for the children to brush afterwards so their teeth can stay sparkling white!

Kitchen Decorations: Shear pink and blue fabric was swagged across the front of the island. White ballons were placed on the floor. Colorful polka dot fabric was tacked behind the sink and a custom Tooth Fairy banner hung in front using shear ribbon. White tissue garland was hung across the ceiling and white glittery molar shaped paper cut-outs were attached to it with ribbon and clips.

Dessert Table: Surrender to your SWEET TOOTH with this Sweet Tooth Shoppe Menu which included tooth fairy cookies, dental necklaces, fairyfetti doughnuts, chocolate tooth wands, meringue toothpaste, cupcake sundaes, marshmallow bites, starburst chews, chocolate mint cookies, lik-m-tongue depressors, toothbrush treats, dessert delights gum and chocolate fairy coins. The DIY tutorial for the Sprinkle Organizer Display can be found HERE!


Invitations: Custom printable invitations that mimic recipe cards were delivered with edible chocolate tooth fairy wands.


Dining Decorations: Adult size chocolate, mint green and light pink polka dot ruffle aprons were draped over the windows as curtains. For the centerpiece, multi-sized stainless steel bowls were stacked and filled with various cooking utensils and curly silver ribbon swooped in and out. The tables were sprinkled with blue confetti dots and birthday themed thick tissue paper table runners ran horizontally down both sides of the table. "Dentist" inspired napkin bibs were provided at each place setting. Instead of chair covers, pink child size ruffle aprons were tied on the back of each guests chair and were not only decorative but useful too. Then DIY Tooth Fairy Pillows were tied with ribbon on top of each apron. Click Here to view the original tooth pillow tutorial created by mmmcrafts. You can personalize them in many ways and turn them into different tooth characters. I definitely recommend that you make your own version of this fun and simple pillow craft!
Party Favors: After the guest child "chefs" decorated their cupcakes, they were set inside striped cupcake boxes with thank you labels. Those along with a small collection of cooking utensils, were all wrapped up in their own aprons to go home with them.


Party styling: the Creative Orchard (Renee Hagloch
Printable party designs: Tooth Fairy Party collection available in the Creative Orchard Shop!


Vendors & Sources: 
DIY Tooth Pillow Tutorial - mmmcrafts
Tooth cookie cutter and tooth candy mold - Amazon
Aprons and cooking utensils - Home Goods
Cupcake boxes, lollipop sticks, plastic bags, glassware, gift bags, pot holders, metal clips, confetti, fabric, polyfill and ribbon - Hobby Lobby
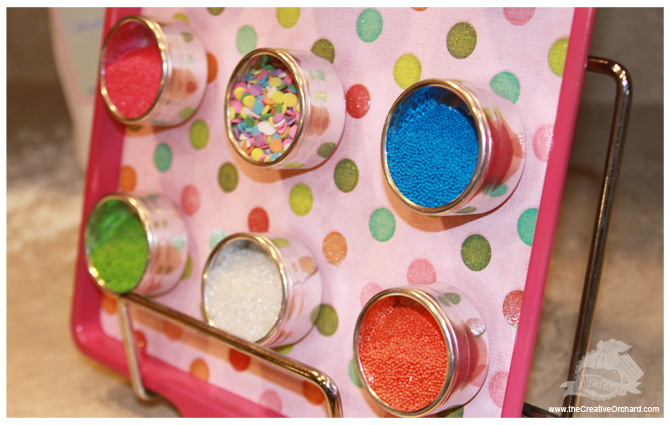
Mini metal spice containers - Michaels
Ice Cream timer - Jo-Ann Fabrics
Silverware, cups, plates, polka dot napkins, balloons, tissue garland, candy sticks and candy necklaces - Party City
Baking supplies, candy, cupcake wrappers and sprinkles - Walmart
Tooth brushes, pretzel sticks, wafers and chocolate coins - Dollar Tree


[ Disclosure: This specific party/party theme is NOT affiliated with any bakery company or brand. The Creative Orchard strictly intended that this specific blog post's content has been provided to promote DIY printable party designs for a DIY children's party ONLY. ]

WARNING: The fake "mouthwash" shown in my photos is just a plain empty plastic bottle filled with blue punch drink inside and the Creative Orchard does NOT encourage anyone to give children real mouthwash! Do NOT let anyone swallow mouthwash. PLEASE CAREFULLY READ THE WARNING SIGNS on a bottle of mouthwash! ]

Aug 11, 2011

CREATE: Sprinkle Organizer Display

For my Tooth Fairy Baking Party, I made this sprinkle organizer display. This is a very simple DIY project and should take about 15 minutes to complete, not including drying time. Keep in mind that there are many other ways to use this project. The mini containers could also be used to hold office supplies, spices, dried flowers, make-up, jewelry, coins, spare parts, craft/sewing supplies and anything else thats tiny and needs organizing. Without the containers and just the magnets, you could turn it into a photo display, message center, recipe holder, welcome sign or inspiration board!


MATERIALS NEEDED: 
1. Variety of sprinkles
2. Decorative paper 
3. Spray paint
4. Glue gun
5. Glue sticks
6. Scissors
7. Round corner paper punch (Large Size)
8. Double sided tape

9. Magnets
10. Mini tin containers with clear lids
11. Cookie sheet (New or Used)


DIRECTIONS:

Step 1:
 Spray paint the cookie sheet all over the front and sides. Let dry. When dry, flip over and spray paint back (*optional). *You only need to spray paint the back if you can see it where ever you plan to display it.


Step 2: Cut decorative paper according to the size of your pan. Only use the round corner paper punch if the corners of your pan are rounded. Once the painted pan is dry, tape or glue the paper on the inside of the pan.


Step 3: Using the glue gun, glue the magnets to the back of the mini tin containers.


Step 4: Fill each container with different sprinkles and carefully close lids. If the lids don't close tightly enough, place a piece of tape on one side to help secure it's contents.


Step 5: Place the magnetic sprinkle containers on top of the decorative paper on the pan. Now you are done and need to find a place to proudly display your finished project!


Aug 10, 2011

CREATE & INSPIRE: Ice Cream Cone Cake Pops

This SWEET feature is in honor of the cake pop craze. Cake pops are typically crumbled cake mixed with frosting, rolled into a ball, stuck on a lollipop stick, coated in melted candy and then decorated with frosting, fondant, chocolate, nuts, sprinkles or candy. These fun and easy tiny treats were originally a creation by Bakerella (Angie Dudley). She has quickly taken traditional Cake Pops to a whole new level. A book called Cake Pops by Bakerella is filled with baking tips, tricks, recipes and sweet inspirations! One of those recipes is for mini Ice Cream Cone Cake Pops and I couldn't resist sharing these with you Full instructions for these Ice Cream Cone Cake Pops are inside the Cake Pops book, but a basic rundown is provided in this post and on Bakerella.


See... the insides really are cake not ice cream! I think the upside down melted cone would make an adorable cake topper for an ice cream or sweet shoppe themed birthday party. Basic instructions can be found here. All you need is a box of cake mix, a container of frosting and candy melts.
• To make the waffle cones smaller, just cut them down to size. Or you can buy mini cones
• Assemble your cooked cake ball inside the cone and then dip in the frosting. Don't worry about being perfectly smooth, the drips will make it look more realistic!
• Decorate your Ice Cream Cone Cake Pops with sprinkles, chocolate frosting and a red peanut M&M for the cherry on top. Now you have ice cream cones that don't have to be frozen and won't give you a brain freeze! 

Photo and Content Source: www.bakerella.com. Copyrighted by Angie Dudley.

Aug 1, 2011

INSPIRE: Heavy Metal that Rocks!

For this party picks post, I have picked galvanized metal. At first you might only think of watering cans, old bathtubs or troughs. But now there are so many other galvanized metal options to choose from to accent your next gathering. Ice buckets, tiered stands, planters, beverage caddies, serving pieces, trays, and more are available online and in stores! Galvanized metal is perfect for any party season because it is weather resistant, watertight, easy to maintain and develops a rich patina with age. There are a variety of different ice buckets that are both functional and stylish. Use pails, buckets or planters for table centerpieces to display flowers, leaves, branches or succulents. The 3-tiered stands are great for cupcakes, fruits, veggies and snack foods. When entertaining, use trays to serve cold beverages or appetizers. View some galvanized metal examples below to see why this heavy metal rocks! Each product was found online at Pottery Barn!

Photo Source: www.potterybarn.com© 2011 Williams Sonoma Inc. All Rights Reserved

Related Posts Plugin for WordPress, Blogger...